Cabo San Juan in Tayrona: Everything you need to know
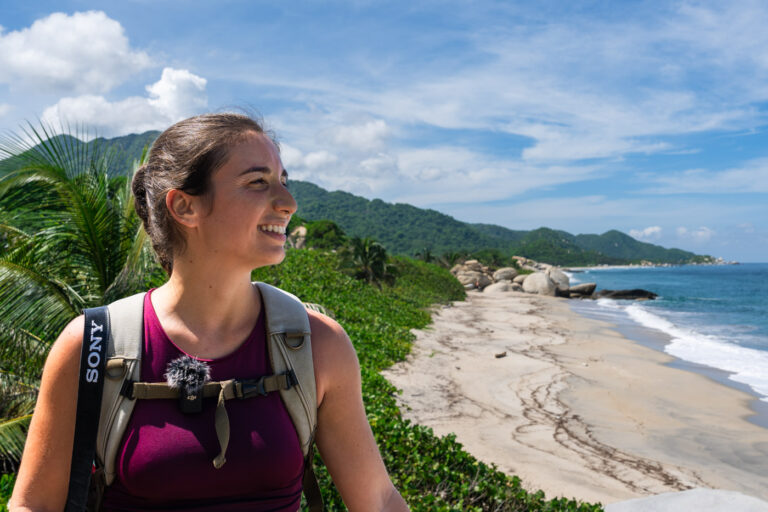
We weren’t sure what to expect before stepping a tentative foot into Tayrona National Park, but Cabo San Juan was definitely an oasis hidden at its centre. With pristine white-sand beaches and the tepid waters of the Caribbean Sea, it’s easy to understand why a pilgrimage here is a must do in Colombia.
Nestled between Seychelles-esque boulders and lined with tropical palm trees, entering Cabo San Juan is like arriving in paradise. But you also need to work for your reward as the main way to reach Cabo San Juan is by hiking.

Sara and I undertook a two-day backpacking trip through Tayrona National Park and decided to camp overnight at Cabo San Juan. It was definitely a unique experience trekking through the Colombian rainforest, but there are a few things you should know before doing so yourself!
Buckle up, because in this travel guide we’ll cover everything you need to know about visiting Cabo San Juan from planning to executing. We’ll also provide advice that we wish we had known before our own adventure. By the end, you’ll be fully prepared for your excursion to Cabo San Juan.
This post may contain affiliate links. Please read our Disclosure Policy.
Where is Cabo San Juan?
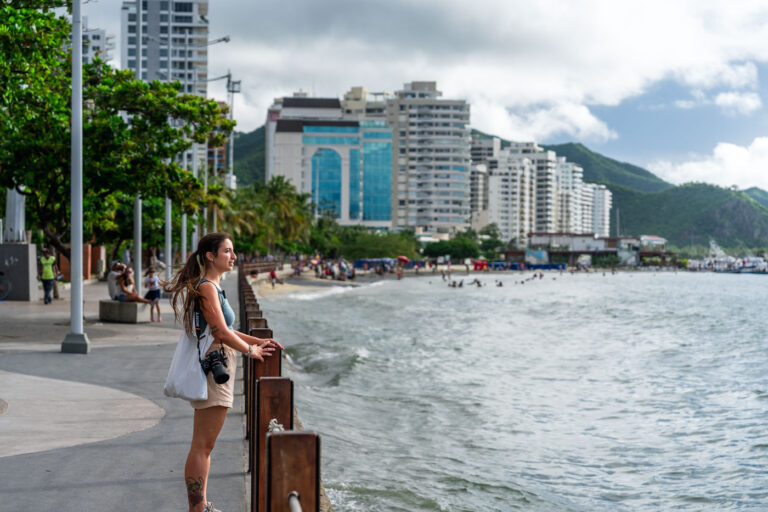
As we mentioned Cabo San Juan is inside Tayrona National Park (Parque Tayrona), but where is this exactly? You can find Tayrona in close proximity to Santa Marta, a popular tourist town on the Caribbean coast of Colombia.

Never heard of Santa Marta? Don’t worry, neither had we until we decided to make it our travel base for a month! You probably have heard of Cartagena though, and Santa Marta is about a 4.5 hour bus journey from there.
If you’re planning to head to Cabo San Juan, then you’ll first need to find your way to Santa Marta.
Getting to Santa Marta
For the sake of this guide, we’re going to assume that you’ve already touched down in Colombia at the very least. If you’re travelling around the country, then you pretty much have two options available for getting to Santa Marta.

By plane
The quickest and easiest way to get to Santa Marta is by flying. Simón Bolívar International Airport is just a 30-minutes drive from the town’s historic centre.
We personally flew to Santa Marta from Medellin and it cost us about $90pp with 23kg of checked luggage. If you are in the Medellin or Bogota area, we fully recommend flying to save time.
By bus
If you’re already in Cartagena or Barranquilla, or you’re travelling on a shoestring budget, then definitely consider taking a bus. The bus system around Colombia is very well connected – it has to be as a lot of locals can’t afford airfares.

Our favourite site to book buses in Colombia was Busbud. We used it a few times, the buses were super comfy and we never had any issues.
How to get to Cabo San Juan from Santa Marta
Congratulations, you’ve made it to Santa Marta! Now you need to get yourself to Cabo San Juan. There are actually two ways you can do this and we’ll cover them both below.
Day trip from Taganga
Your first option is to take a day trip from Taganga. This route is best for those who don’t fancy hiking through a humid rainforest. Instead, you can book a boat to take you directly from Taganga to Cabo San Juan – negating any walking at all!
There are enough vendors offering this trip in Taganga that you won’t need to worry too much about finding transport. Just make sure you arrive nice and early in the morning as boats start to leave around 9am.

A return ticket will set you back roughly 100,000 COP ($24.82) and the journey takes around 45-minutes. The final boat left Cabo San Juan when we were there at around 6pm. These seas are notorious for being a bit choppy, so take the right precautions for seasickness.
Booking a tour
If you don’t like wasting time organising your own trip but still want to enjoy the hike, then consider booking a tour. Obviously it’s going to hit the bank a bit harder but at least you can feel secure knowing everything is taken care of. This includes transportation to and from the park, a local guide to lead the way and even a hearty lunch.

If this is something you might be interested in, then check out this private tour for a day trip! The
Visiting Tayrona National Park independently
Finally, if you’re wanting to get down and dirty hiking and sleeping under the stairs at Cabo San Juan, you’ll be better off visiting independently. This is what we did and we had a great time!

Heading to Tayrona independently means that you can create your own itinerary and move at your own pace. Maybe you want to trek slower to keep a keen eye out for wildlife, then two or three nights in Tayrona might be for you. Maybe you’re a fast hiker and just want to bash Tayrona out in a day – you can do that!
Organising and heading on your own trip to Tayrona means you can do whatever the hell you want!

Firstly though, you’ll need to get there. We decided to take a taxi at 7am from Santa Marta. This negated the need for us to find the bus so early in the morning. Our wallets did feel a tad light after as it set us back $25, but it was worth it.
Alternatively, you can head to the Mercado Publico de Santa Marta in the centre of town. Here on Calle 11 you’ll spot the green buses that head to Tayrona. If you struggle to find one, just holla “Tayrona?” at a local and they can point you in the right direction. The buses only cost 8,000 COP ($1.99) each way and we actually took the bus back to Santa Marta from Tayrona after our trip.
Need travel insurance?
Sara and I have been using Safety Wing for over two years now! They specialise in nomad travel insurance, so whether you’re travelling long-term or on a short trip, they got you covered!
Calabazo or El Zaino entrance?
You probably haven’t heard of these two places yet, so let us explain about each entrance to Tayrona and advise which one is best for you.
El Zaino is the main entrance of the park and it’s where we began our hike. There are tons of restaurants nearby if you need some brekkie to fuel your trip and it’s also where you need to check in to your accommodation. So if you’re doing an overnight trip, El Zaino is the de facto entrance.

The Calabazo entrance was where we finished our hike. It’s more of an unofficial entrance without the bells and whistles that El Zaino has. Honestly, we’re not entirely sure what the entry process would be like if you tried to start here. Actually, there’s probably a high chance you can’t and you’ll need to go to El Zaino first to pay the entrance fee and check in. Then you can take a bus back to this entrance.

If, however, you have decided not to stay in the park and have instead opted for accommodation outside, then which entrance you choose depends on your destination. For Playa Arrecifes, La Piscina and Cabo San Juan, we recommend El Zaino. However, if your intended destination is Playa Brava, then Calabazo is your best friend. You’ll probably still need to head to El Zaino first, though, to be given your entry wristbands.
Tayrona National Park entrance fee
Assuming you’ve made it to El Zaino, it’s time to cough up some dough! Tayrona National Park is a protected area and as such, they do take a daily entrance fee to maintain park conservation.

The fee isn’t backbreaking, but it’s also not to be sniffed at either. We needed to pay 62,000 COP ($15.39) per person for entry. It doesn’t matter if you head in for one day or three days, it’s all the same fee.
You also need to pay for mandatory insurance. Yes, even if you have your own travel insurance already! They have first aid tents and ambulances inside the park in case of accidents and to use them you need to fork over 6,000 COP ($1.49) per day on entry.

You’ll be given wristbands indicating how many days you’ll spend in the park and that you’ve got medical cover. Also, don’t forget to bring your passport, the staff will ask for it at the entrance!
Hiking from El Zaino to Cabo San Juan
Right, now that we’ve made it into the park, we can talk you through the hike! The trails are pretty easy to follow so we won’t detail every twist and turn. However, there are some little trails branching off the main route that we found a bit exciting!
We’re not going to go into detail about the different beaches as we’ll publish another guide about that in the future. Instead, we’ll focus on the actual journey from the park entrance to Cabo San Juan.
El Zaino to Cañaveral
There are actually two ways to cover this first section of the trail. You can either hike it or you can take the bus!
We decided to hike it as we read online that it’s a good road to start spotting the unique Colombian wildlife we’ve heard so much about. It’s a simple trail, you just need to follow the road. One thing to note is to just be cautious of the minibuses passing every now and then as they are quite speedy.

Here are the hiking stats:
DISTANCE
4km
ELEVATION
42m
EST. TIME
1 hour
SKILL LEVEL
Easy
DISTANCE
4km
ELEVATION
42m
EST. TIME
1 hour
SKILL LEVEL
Easy
We were actually a tad disappointed by this walk. We only saw one small cotton-top tamarin and heard some howler monkeys in the distance over the entire hour we trekked. This is probably due to the traffic hammering up and down the road.

So we recommend taking the bus and saving some time. We only reached Cabo San Juan about an hour before sundown so you might be grateful for the extra leeway. It only costs 7,000 COP ($1.74) per person and will have you at Canaveral in less than 10-minutes.
9 Piedras (9 Rock Loop)
DISTANCE
1.2km
ELEVATION
38m
EST. TIME
35 mins
SKILL LEVEL
Easy
DISTANCE
1.2km
ELEVATION
38m
EST. TIME
35 mins
SKILL LEVEL
Easy
The 9 Piedras loop is a small hiking trail next to the car park where the bus will drop you off. Before checking out Playa Canaveral, we recommend this miniature excursion.

You’ll find the trailhead at a wooden gate. The gate will be closed but you can just shimmy around the side. Swing right after the gate and follow the trail until you get back to the starting point!
The trail gets its name from the nine large egg-shaped rocks along the trail, each one with an enlightening statement attached to it. It seems like it also used to head along the beach but that part of the trail is now closed.

We were quite unlucky with wildlife here too, only seeing some leaf-cutter ants and a dead tarantula. But it was very quiet and we didn’t pass anyone else on the trail which was a bonus!
Cañaveral to Arrecifes
DISTANCE
3.8km
ELEVATION
89m
EST. TIME
70 mins
SKILL LEVEL
Moderate
DISTANCE
3.8km
ELEVATION
89m
EST. TIME
70 mins
SKILL LEVEL
Moderate
The next section of the hike will take you from Playa Canaveral to Playa Arrecifes. This is the most arduous section of the hike with the greatest elevation.
A lot of the trail is actually covered in boardwalk, making the hike more easier. There are also a few flights of stairs to climb and descend, but again they are man-made and simple to navigate.

Once you reach the peak of the elevation, you’ll be blessed with the most stunning view of Playa Arrecifes. A long white-sand beach with beautiful palm trees and bulbous rocks acting as wave breaks. This is the first time we felt like we had really entered into paradise since entering the park.
On the route back down to sea level, you’ll come across a few vendors selling water and ice creams. We treated ourselves to a couple of ice-pops and honestly it was like heaven. We fully recommend an ice-pop to replenish your energy after sweating out your soul in the humidity.

When we arrived at Playa Arrecifes, we called it time for lunch and indulged in a tasty chicken sandwich from the Ecohabs restaurant. You can also opt to stay here overnight too if you’re doing more than one night in Tayrona. Although we’d recommend against it as you can’t swim in the sea here.
Arrecifes to La Piscina
DISTANCE
1.5km
ELEVATION
6m
EST. TIME
25 mins
SKILL LEVEL
Easy
DISTANCE
1.5km
ELEVATION
6m
EST. TIME
25 mins
SKILL LEVEL
Easy
From now onwards the trail is largely flat with minimal elevation. So rejoice in the moment knowing that from here-on-out the hike is much more simple.

The trail winds through the forest parallel to the ocean. You’ll be sheltered from the sun, for the most part, by towering palm trees. The only thing to really be aware of are huge muddy sections kicked up by the horses. We can imagine that if it had rained recently, these sections would be pretty gruesome.
En route to La Piscina, you’ll also cross over Playa Arenilla. This is a small, peaceful beach which is secluded from the ocean current by giant piles of rocks. These rocks create a tranquil little bay with calm waters and it’s actually the first place along the hike you can swim in the ocean!

Head straight over Playa Arenilla and you’ll pass through a small walkway between rocks that’ll lead you directly to La Piscina.
La Piscina to Cabo San Juan
DISTANCE
1.3km
ELEVATION
23m
EST. TIME
20 mins
SKILL LEVEL
Easy
DISTANCE
1.3km
ELEVATION
23m
EST. TIME
20 mins
SKILL LEVEL
Easy
Finally, it’s the last push to Cabo San Juan. From La Piscina, follow the sign that says “Sendero Cabo”, or Cabo path. It’s a short trek with a mild elevation that’ll take you through a forested path surrounded by rocks. With some sections requiring you to clamber over some of said rocks, sturdy footwear is recommended.

Eventually, you’ll spot the entrance to Cabo San Juan in the distance. To the left of the entrance is the horse stables and at the entrance is a hut with a man checking tickets and wristbands.
Congratulations, you made it to Cabo San Juan!
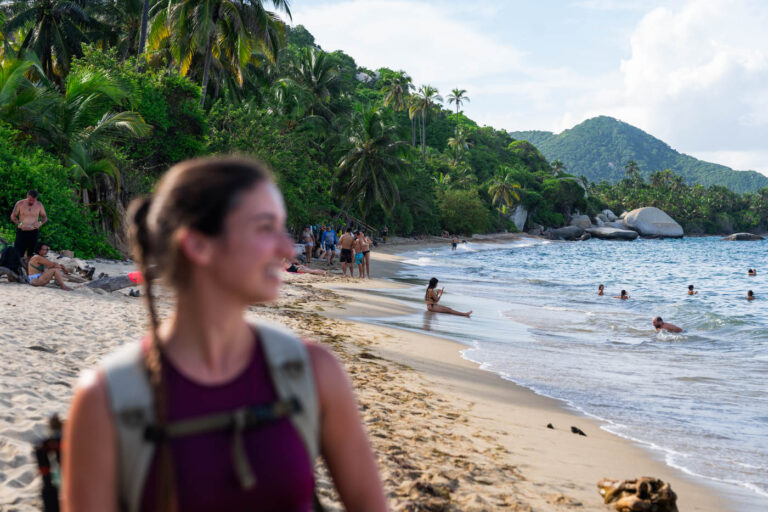
Cabo San Juan Beach
It wouldn’t be a stretch to call Cabo San Juan the best beach in Tayrona National Park. We stopped at most beaches along the route in and out of the park, and Cabo San Juan was definitely the main attraction.

Here the beach is split into two areas, broken in the middle by a rocky outcrop with the mirador tower on top. Essentially this means that Cabo San Juan is made up of two small bays. Because of the bays, the Caribbean Sea here is super calm and swimmable. We even saw some people snorkelling around the rocks!
Even though we arrived pretty late in the day, there was still plenty of room on the beach to lay down our towels. We soaked up the sun for a good hour before cooling off in the ocean and making the short commute back to our tent.

We could imagine coming back to Cabo San Juan with a group of friends and some beers. It must be nice to chill on the beach all day, listening to music and hanging out!
Want to visit a nudist beach?
Only a short 20-minute walk from Cabo San Juan is Playa Nudista – the only nudist beach in all of Colombia!
Camping area at Cabo San Juan
Booking an overnight stay at Cabo San Juan was the best decision we made. Arriving early, smashing the hike to Cabo San Juan, exploring and then having to hike back all before the park closes sounded like torture to us.

There are multiple accommodation options inside Tayrona but at Cabo San Juan specifically, you have the following choices:
- Cabanas 250,000 – 400,000 COP
- Bringing your own tent 30,000 COP
- Booking a hammock 40,000 – 60,000 COP
- Booking a tent 70,000 – 140,000 COP
We decided to pre-book a double tent. It was a basic structure with a double mattress on the floor laid upon some wooden pallets. The bed had dead bugs on it when we arrived which we promptly brushed off and the sheets felt a bit sticky but it was good enough.

We paid 150,000 COP ($37.24) for a single night which, for us, felt overpriced given the conditions of the tent. On top of this, we really struggled to sleep at night in the humidity of the rainforest.
If you think you’ll get a comfortable sleep in a hammock, we recommend booking that instead. You do open yourself up to mosquitos overnight as no nets are provided, but you’ll also get the sea wind. The best hammock spots are on the mirador tower at 60,000 COP ($14.90). Up here you’re guaranteed to get the best of the sea breeze.

You may be wondering whether you can shower at camp? Well my friend, you’ll be glad to know that there are showers. There isn’t any hot water, and they’re far from luxury, but they’re more than good enough after a day trekking through the soupy-humid hell that is a rainforest.
To book, you have to send a message to +573112589907 on WhatsApp. The guy on the other end of the chat will help you reserve your spot.
Eating at Cabo San Juan
There’s one restaurant that serves everyone at Cabo San Juan at an extra cost. It only opens at certain times so be aware of that.

The way the restaurant works is that you need to choose your meal from the menu board and then go and queue up to order at the kiosk. The guy will give you a ticket with a number on it and when the kitchen staff bring your meal out, they’ll shout your number. If you order juices, you can take your ticket to the juice bar to collect them.
Meals range between 15,000 COP ($3.72) for breakfast to 50,000 COP ($12.52) for some dinner dishes. We had one dinner and one breakfast here and the food was decent but it’s not going to be winning any awards anytime soon.

There’s also a small shop on site that sells everyday products like water, oreos, toothpaste, tampons, etc. You can find it directly to the right of the restaurant.
What to Pack for Cabo San Juan
After our two day trip we got a good sense of what essentials are needed for a trek through Tayrona National Park. Here’s an extensive checklist of things you NEED to bring with you. Grab a notepad because you’ll have to jot these down:
- Sun Cream – kind of self-explanatory but just in case, you are basically in the Caribbean incredibly close to the equator, so stay protected.
- Mosquito Repellent – this is a must. We were bitten alive both while walking and while sleeping. The stronger the better! Check out our Tayrona recap reel on Instagram for full damage expectation!

- Long pants – in a similar vein, if we have long pants to put on you can save your legs from the mosquitos.
- Drinking Water – enough to see you through the hours it’ll take you to trek to Cabo San Juan. There are a few places to pick up some bottled water en route, but it’s best to be safe.
- Electrolytes – you can buy these by the sachet in powder form. Great to mix with your water to replenish your salts after sweating so much.
- Water Bottle – a vessel needed for your drinking water. Bear in mind plastic bottles are not allowed past the entrance.
- Snacks – there’s not much option for buying snacks along the trail and even the restaurant at Cabo San Juan is only open at certain times. You might need an energy boost.
- Spare Clothes – at the very least, you’re going to want one t-shirt per day. You will sweat, especially with a backpack, and changing into a dry top will be equal to ascending to heaven.
- Swimmers – another obvious one, you’re going to want to take a dip!
- Microfibre towel – we always recommend these over regular towels. They pack down smaller, weigh less, dry quicker and sand doesn’t stick to them.

- Rain Jacket – you’ll be trekking in the Colombian rainforest, there is a chance it may rain. Especially during the October to January rainy season.
- Hat/Cap – protect your head from direct sunlight to prevent possible heat strokes.
- Head Torch – if you want to get a unique perspective of the jungle, go on a night trek! Also, they’re handy to get from the tent to the toilet.
- Padlock – the hammocks come with an allocated locker for your belongings, but you’ll need a padlock.
- Cash – it’s possible to pay for the entry with credit card, but everywhere else we stopped other than the Ecohabs restaurant in Arrecifes only took cash – even Cabo San Juan restaurant.
- Passport – as mentioned before, this is essential to purchase your entry ticket into the park.
- Hiking Boots/Trail Runners – you’re going to want some sturdy and waterproof footwear to navigate the trails.
- Flip Flops – will come in hand when walking around the campsite so you don’t have to keep taking off and putting on your big boots.
- Toilet Paper – we were surprised that the toilets at the campsite actually had some, but you never know so it’s better to be prepared.
- Camera – a definite essential for us. If you want to capture your experience for memories or take wildlife portraits you’ll need a camera.
- Plastic Bag – somewhere to pack your wet swimmers and sweaty clothes to not dirty the rest of your belongings in your backpack.
- Washing Line – some tents had guy ropes to tie to trees, but only a few. Having an extra line to tie up will be great for drying out clothes. Beware though, clothes don’t dry very well in the humidity.
- Power Bank – to charge your phone on the go… enough said.
Tips for visiting Tayrona National Park
From two underprepared hikers like us, these are the tips we’d provide for you to keep in mind while you plan your trip:
- Pueblito is closed – Pueblito is a small indigenous village in Tayrona that used to welcome visitors in to learn about the life of the villagers. The villagers have since closed their gates to tourists.
- Hiking from Cabo San Juan to Calabazo is unnecessary – unless you really really enjoy hiking, there’s no need to continue hiking past Cabo San Juan. The elevation gain is BRUTAL and it’s unbearably hot when climbing. With Pueblito being closed, and unless you plan to hike to Playa Brava, just hike back from Cabo San Juan to El Zaino.

- No plastic bottles allowed – to help prevent littering in the park, you’re not allowed to enter with plastic bottles.
- Visiting in the off-season rules – we underwent the hike in November. It was technically the rainy season but luckily we only caught a bit of rain overnight. The benefit being there’s less people on the trail and at Cabo San Juan.
- Avoid the weekends – similarly, weekends will see large influxes of domestic tourists into Tayrona. If possible, try to plan your trip between Monday to Thursday.
- There are charging outlets at Cabo San Juan – believe it or not, there’s a station of outlets for charging devices at the camp site. They are public though so be wary if you plan to leave your phone or laptop charging and walk away.

- Tackle some of the trails on horseback – if you’re not the fittest person and you don’t hike very often, consider hiring a horse to ferry you over the longest distances.
- Check to see if Tayrona National Park is open – at certain points of the year Tayrona closes its gates to visitors at the request of the indigenous population. It looks like in 2024, Tayrona will be closed between 1st-15th February, 1st – 15th June and October 19th to November 2nd.
- Prepare for rain – even outside of the rainy season, Tayrona National Park is still a tropical rainforest. So even though it’s less likely, you still may experience some rain.
- Opt for the shuttle bus – we just want to reiterate that the main road from El Zaino to Canaveral doesn’t see much wildlife action. If we were to go again, we’d definitely choose the shuttle instead of walking.
Is Cabo San Juan safe?
The easy answer to this is yes! There is absolutely no danger in Cabo San Juan – at least from humans. The entire park is protected and people coming in and out are closely monitored. The only danger from humans would be from other tourists who might sneak into your tent and rob you.

Other dangers to watch out for are dehydration, heat stroke and getting lost. But these are easily avoidable by staying hydrated, wearing a cap and suncream, and sticking to the paths. Oh, and there’s the jaguars… but we doubt you’ll even see one!
Is Cabo San Juan worth visiting?
We can say with utmost confidence that Cabo San Juan is 100% worth visiting. The scenery of giant smooth rocks, tall palm trees and smooth white sand absolutely blew us away. The only downside for us was that we didn’t plan to stay longer!
We believe that Cabo San Juan, and by extension Tayrona National Park, is a gem in South America and should be at the top of everyone’s travel hit-list for Colombia. You’d really be doing yourself a disservice by not putting it in your itinerary. Don’t be the one to miss out!
More beaches in Tayrona?
We published a full article outlining all of the beaches inside Tayrona National Park that are accessible to the public. You can check it out here!